6 easy steps to onboard a new Cloud Provider in ServiceNow using Hashicorp Terraform

The Terraform ServiceNow Service Catalogue integration enables your end-users to provision self-serve infrastructure via ServiceNow. By connecting ServiceNow with Terraform Enterprise, this integration lets ServiceNow users create workspaces and perform Terraform runs, using prepared Terraform configurations hosted in VCS repositories.

Integrating ServiceNow with Terraform Enterprise involves several configuration steps. You will perform some of these steps in ServiceNow, and some of them in Terraform Enterprise.

Prerequisites:

Note – Terraform Cloud’s access model is team-based. To perform an action within a Terraform Cloud organization, users must belong to a team that has been granted the appropriate permissions.

  • A ServiceNow instance or developer instance. You can request a ServiceNow developer instance at servicenow.com.
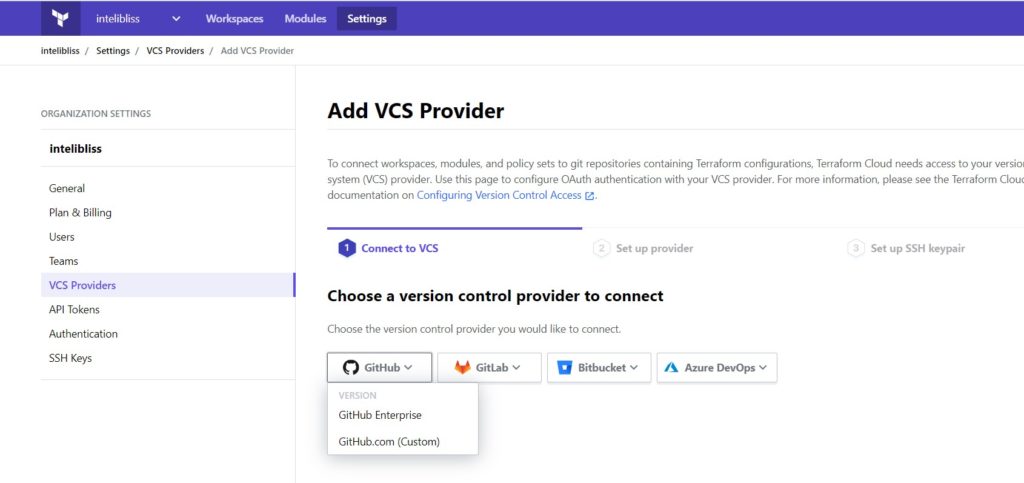
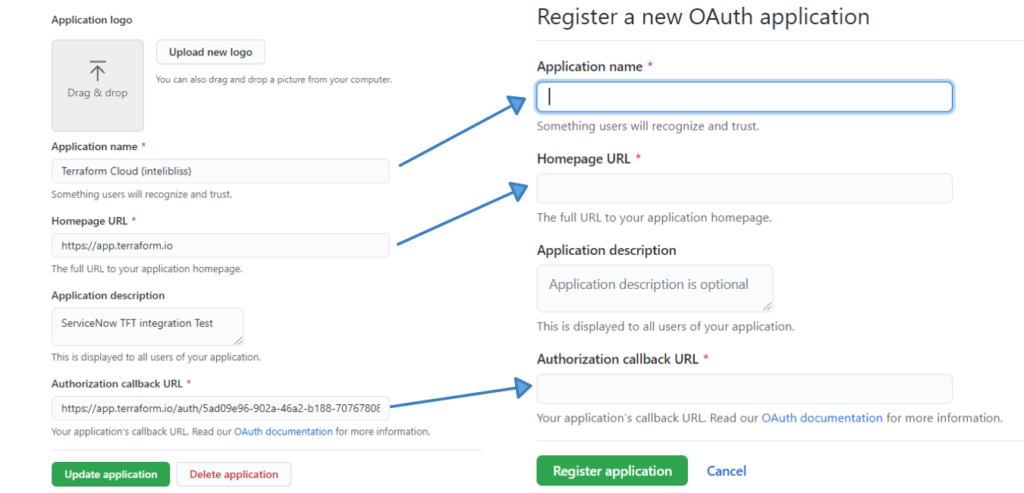
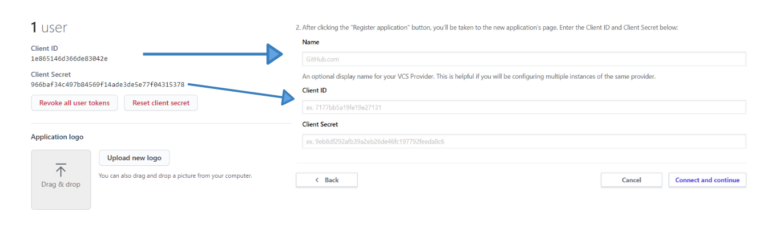
  • supported version control system (VCS) with read access to repositories with Terraform configuration.
  • A private Git repository to host the ServiceNow integration.

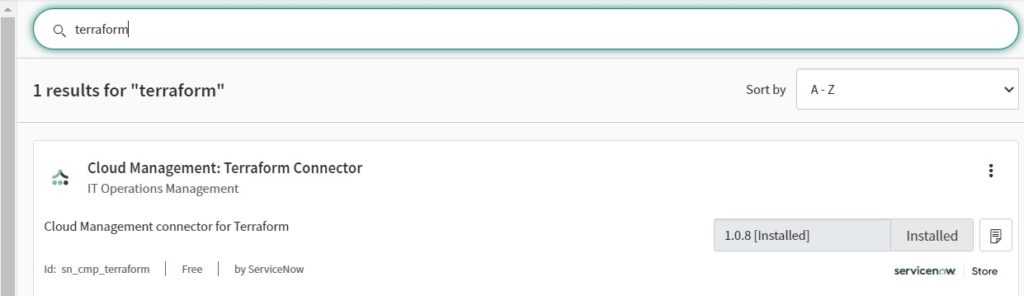
https://developer.servicenow.com/connect.do#!/share/contents?category=Cloud%20Management%20Recipes&page=1

Now we have all necessary accounts created, let’s get started with the implementation and configuration.

Step 1- Create a VCS Provider

We will be establishing a communication channel between GitHub and terraform

  • GitHub repository contains cloud provider templates
  • Terraform contains workspace wherein actually run and apply works
  1. Go to terraform.io  choose your organisation   click on settings select VCS Provider  click on Add VCS Provider button

2. Select GitHub -> choose GitHub.com(custom)

3. Open in a new tab  “register a new OAuth Application”

Copy and paste the values generated on terraform.io screen, click Register application

On terraform, copy, and paste Client ID and Client Secrete, click on connect and continue

We have successfully created VCS provider, a connection between GitHub and Terraform.

Step 2 – Download Terraform connector plugin in your ServiceNow instance

Step 3 – create Credential to discover repositories

  1. Go to Cloud Admin Portal
  2. Manage ↦ Credentials  New API Key Credentials
  3. Provide API Key – Generate an API Token on terraform.io
  4. Create “Credentials” type alias in Connection & Credential Aliases table

Step 4 – Create config provider

  1. Go to Cloud Admin Portal
  1. Manage  Config Management ↦ New  provide below details Save

 URL – https://app.terraform.io/api/v2

3. Select Created config provider and click on “Discover Now” (non-schedulable)

4. Once complete, click on “TFE VCS” Select VCS Provider created in step 5. Repeat Step 4 to create an API key for GitHub (Generate user token in GitHub Settings Developer Settings  Choose whichever is suitable)

6. Completing point 4, provide the created credentials  Save  Click on “Find Branches and Repositories”

All repositories present in github should be visible under Related Items

Step 5 – Design Catalogue Item

1. Go to Cloud Admin Portal

2. Click Design Cloud catalogue Item New and provide below details Submit

3. Open same record Cloud Template New Select Configuration Installable (discovered in Step 5) Submit

4. Template should be Validated and saved

5. Parmeters and Variable Set should be created

6. Catalog Item is all ready to be used on Cloud User Portal – Make sure to check “Active” box on the form and Update

Step 6 – Order Simple VM from Cloud User Portal

  1. Go to Cloud User Portal , select the catalog item created in above step, provide order details and submit
  2. Observe , Flow triggered in SN intance, worksapce created in TFE and webhook created in GitHub
  3. Terraform Run and apply the changes triggered from SN and provision the VM